How to Make a Campfire Pizza
Pizza is one of the foods constantly craved while camping, but the concept of making a pizza while at a campsite seems impossible due to the steps, ingredients, and most importantly, the oven needed to make the pizza. You might be thinking about not being a pizza-making expert, so you might have some problems with the dough and other steps to make a very delicious pizza. The good news is there is a simple way to make pizza at a campsite from scratch and allows you to live your dream of enjoying hot pizza at night with a bottle of cold sparkling water which you can add a twist by squeezing limes or lemons to enjoy a unique, refreshing feeling. You can also enjoy the campfire pizza with soda or wine.
The campfire pizza is one to enjoy during camping, one of the most rewarding meals you can make, and it will be a shame not to enjoy it while experiencing the outdoors. Get your camping materials ready along with your portable power station. The AceVolt Campower 700 Portable Power Station Solar Generator is ideal. You can use it to power up your portable AC if you are camping during the humid months of the summer.
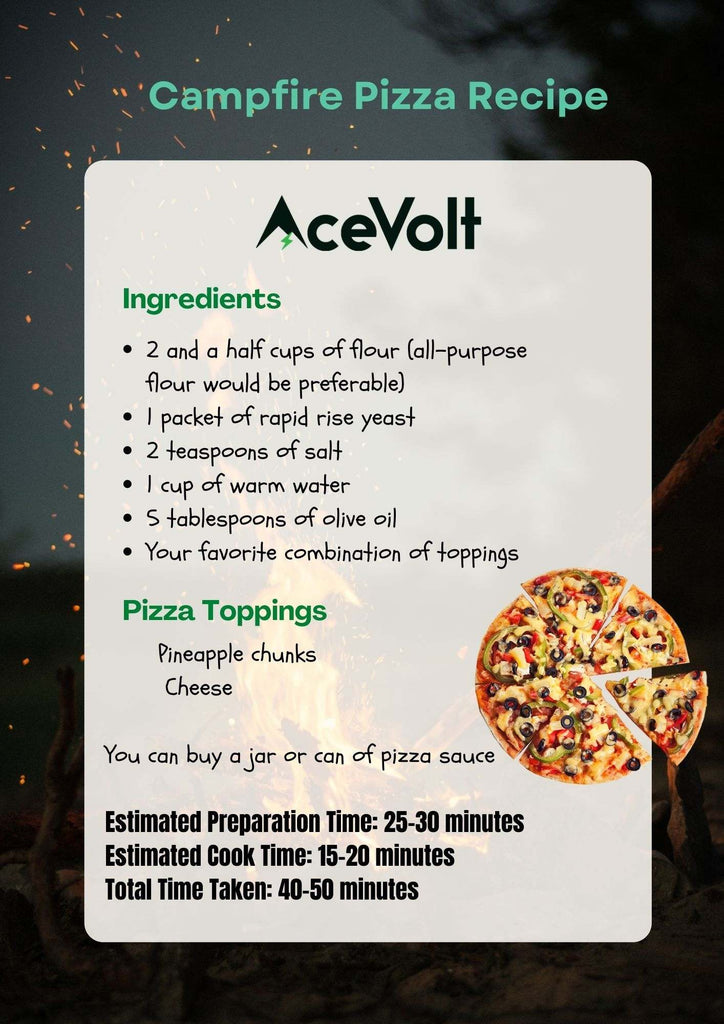
The recipe below helps you make pizza over a campfire, and you are free to add as many toppings as you wish.

Equipment needed
- 1. Campfire grate.
- 2. Charcoal.
- 3. Mixing bowl for your dough.
- 4. Fork or metal turner for flipping dough.
- 5. 10 inches or 12 inches cast iron skillet.
- 6. Cutting board.
- 7. Chef’s knife for dicing vegetables (if you are making use of vegetable toppings).
- 8. Tongs for flipping dough.
- 9. Oven mittens or gloves.
- 10. Plates and napkins for serving.

Instructions
- 1. Start a campfire and let it burn down till your hot coals have achieved minimal flames. If you opt for an electric stove ensure you have your AceVolt Campower handy.
- 2. Get your mixing bowl and add in your all-purpose flour, yeast, and your salt. Mix the ingredients in the mixing bowl together with your fork so as to distribute them evenly.
- 3. Add warm water and two tablespoons of olive oil to the dry ingredients in the mixing bowl and mix them thoroughly with your fork until the ingredients start to take shape and form the dough.
- 4. Knead the dough a few times using your hands in the mixing bowl or knead it on a surface that has been floured lightly if it is more comfortable for you. This allows for all ingredients to be well incorporated, and the dough comes together well.
- 5. Cover your dough and let it rise for 20 minutes.
- 6. After the yeast has done its work on the dough by letting it rise, bring it out and place it on your cutting board before dividing the dough into two equal pieces.
- 7. Now you proceed to form your pizza crust. To form the crust, you add one tablespoon of olive oil into your cast iron skillet, which should be preheated. You can preheat the 10 inches skillet for a thicker crust or the 12 inches skillet for a thinner crust. Use one tablespoon of olive oil to coat the surface of the cast iron skillet. You then place one of the dough halves into the skillet and make use of your fingers to press and push the dough towards the edges of the cast iron skillet. Also, drizzle ½ tablespoon of olive oil along the edge of your cast iron skillet.
- 8. Now place the cast iron skillet on a grate over your campfire or if you are using a stove, place it over the stove, which is set at fairly high heat. Allow your dough to remain in the skillet for 3 to 5 minutes until the bottom becomes firm and begins to turn golden brown. You might want to lift one of the sides when your timer hits the 3-minutes mark to check on the progress, and then you can determine how much longer you need to let it remain on heat.
- 9. Pull your cast iron skillet off the fire and place it on a cool surface. Using a pair of tongs, gently lift the pizza crust out of the skillet and flip it over, so the uncooked side faces down in the skillet. Ass your toppings to the pizza, then cover the pizza with a lid made of cast iron or make use of a sheet made of foil, and when you return the skillet to your campfire.
- 10 . Cook the other face of the pizza for an additional 3 to 5 minutes until it becomes golden brown. You then remove the foil sheet or the cast iron lid after a few minutes. Once the cheese topping has melted, let the steam escape for the remainder of your cooking period.
- 11. Remove your cast iron skillet from the campfire, place it on a cool surface, carefully transfer the pizza to a plate, and then repeat the entire process with the second half of the dough.
NOTE: The above recipe makes a single 10 inches pizza or a single 12 inches pizza, the size depending on the size of your cast-iron skillet. The recipe will also work with other cast iron cookware, including the Dutch ovens and cast iron griddles. Just adjust the number of your ingredients to fit the size of the cookware you will be making use of.

Tips to follow when cooking with a cast-iron skillet
- The first thing to do is to season the surface first. This can be done by coating the surface with olive oil after it has been preheated.
- Always ensure you use gloves or oven mittens while cooking, as the surface of the iron, will be hot, to avoid burning the skin around your hands.
- Prepare your pizza using the cast iron skillet over an open campfire using hot coals and open flames. A fire that is too hot, as seen in open flames, will not cook the inside of your pizza recipe, but it will burn the outside.
- Always make sure you wash and clean the cast iron skillet after use. You should use a rough vegetable scrubber to wash the cast iron. You then rinse and dry it thoroughly before storing it.
And there you have it, everything required to make a campfire pizza from the ingredients, equipment needed, and the procedures. Say goodbye to just craving pizza when camping. Now you can enjoy it in your comfort till your cravings are satisfied. Following this recipe, a campfire pizza becomes easy to make. It is one of those recipes the whole family will love and enjoy. Make plans to add it during your meal planning for the summer camping trip and experience peak deliciousness under the stars at night on your campground.


Leave a comment